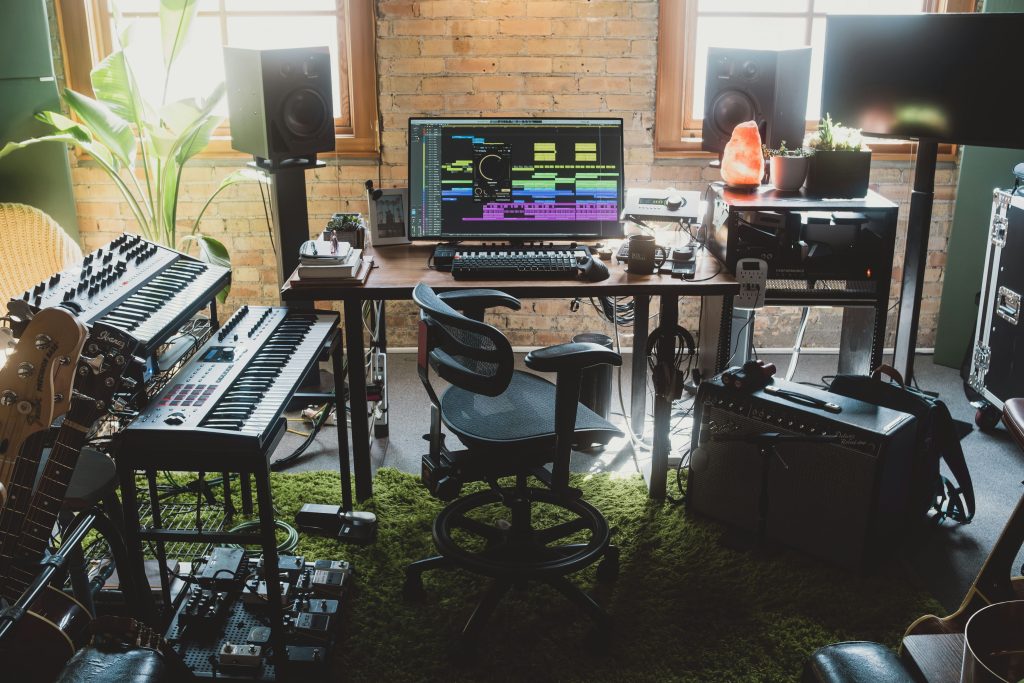
Setting up a home studio is a natural step for anybody who is interested in music production, but the options can at first appear bewildering. While I’m yet to meet anybody who claims to have ‘finished’ their home studio, broadly speaking the studios I’ve encountered fall into two camps – those which grow and develop over time and those which are reconsidered and started over, and over, and over.
To avoid making the wrong decisions when setting up your studio, it’s important first to ask yourself the most important question. What do you want to do in your studio?
What are you going to use your home studio for, and how?
It might be tempting to say “everything”, but for a successful studio I would suggest that that’s not a good answer. What do you do now and what do you want to do next? Trying to accommodate those two questions is probably as far as I would consider planning for. Are you a producer or a beat maker? Are you In a band? Are you a songwriter? If so, what if any audio recording do you think you’re going to need to do? Will you be completing your projects with the help of others, or do you imagine you’ll be working entirely solo? If you have answers to these questions then you’re in with at least a fighting chance of avoiding potentially costly mistakes.
What space do you have available for your home studio?
The second consideration you need to take into account is what space you have available. The majority of equipment doesn’t necessarily have to be all that expensive, instead it’s the space in which you do your work which will be the most expensive part of your studio, and the part you have the least ability to fundamentally change. You might well have the gear and the skills necessary to record your band, but unless you have a suitable space, you’ll probably be better off recording elsewhere. This doesn’t have to mean hiring a recording studio, though that is often a great idea. If you want to record bands then consider making the core of your studio easily transportable and rather than bringing the musicians to your studio, take the studio to the musicians. There are always options.
For example some instruments don’t record as well in smaller spaces. A drum kit might fit in your space at home but a low ceiling will cause reflections which will color the overhead mics which are so crucial to capturing the sound of the kit. A smaller room will limit your choices when it comes to placing room mics and even using very close miking you can never entirely avoid the sound of your room. Bigger rooms can be more forgiving to work in so it can be very worthwhile to find a suitable space you can hire. if you’re bringing your own gear it doesn’t have to be a studio, as long as it sounds good, is quiet and you can make a noise without upsetting anyone it can be a great option.
How much should you spend on a home studio?
Once you know where you are going to be working and what kind of work you want to do, the next consideration is budget. Choosing and buying gear is of course exciting, but when planning your budget be aware that the less exciting things like cables and stands all need to be factored in or you’ll end up in an environment which will make your life more, rather than less, difficult. When it comes to choosing gear, I’d recommend buying gear you won’t outgrow. A few pieces of quality gear which will stay with you as your experience and your studio grows is far better than an Aladdin’s cave of budget gear you’ll end up selling, or binning when it breaks. I’ve still got a pair of Genelec 1029a, my first proper monitors, which I use as secondary monitoring over by my keyboards now that they have been replaced by something bigger. And I still use the first condenser mic I ever bought: A Neumann TLM103 which I had to save for but it still stands up to the alternatives now that my mic locker has grown. If you can’t buy once and keep, buy no more than twice. Get something which will get you started and, when you can afford it, move up to something you’ll keep forever. Upgrade, but avoid moving sideways in terms of quality.
Computers And Software
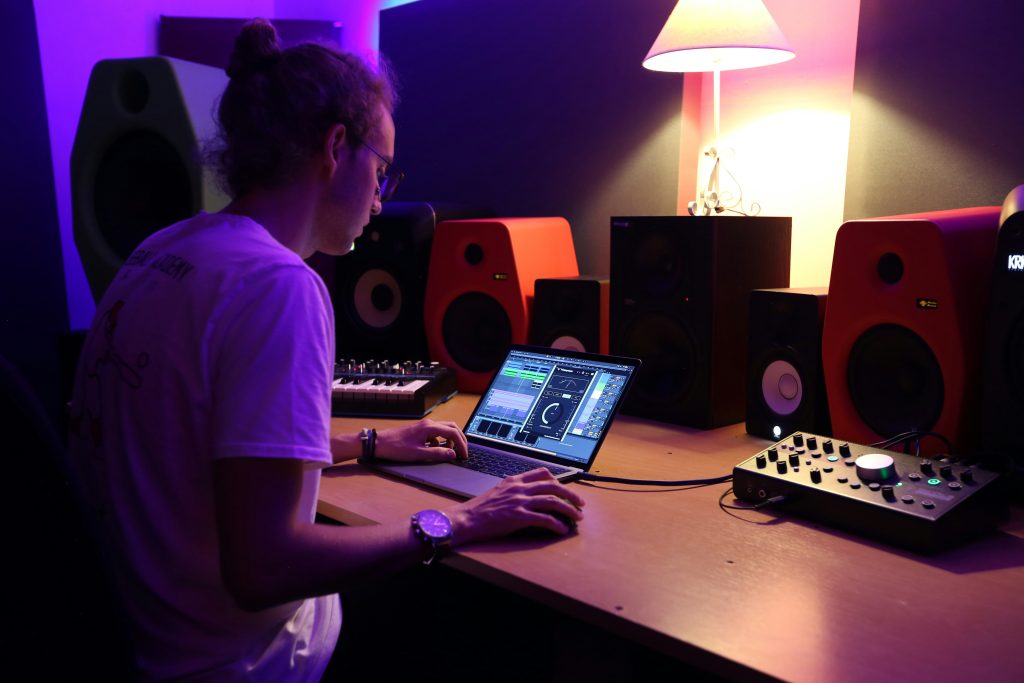
The exception to the rule of trying to buy something you will keep forever is your computer and its software. Computers are effectively disposable. While they serve a purpose, they have to be replaced arguably sooner than any other bit of gear. Exactly which type of computer – Mac or PC – you choose is a matter of preference. The debate between Windows and Mac users rages online and will continue to do so but if you are happy using a PC then use one. Likewise if you prefer using a Mac then that is your choice. That said, in my opinion, here are a couple of advantages to using a Mac for music production. One is Core Audio, which makes life very simple for people using their computers for audio and for tasks like routing audio between applications due to the availability of very elegant software solutions which are very difficult to match without access to this technology. MacOS also supports AVB networking which, for users of hardware which uses this non-proprietary method of routing audio over ethernet networks, is significant.
The most obvious difference between using a PC and using a Mac for people starting a home studio is how it affects their choice of DAW. Logic Pro is very popular but it’s Mac only. The downsides to using Macs are that they are significantly more expensive than PCs and they are unsuitable for people who like to upgrade, rather than replace their computers. As well as a computer and some software, don’t overlook the need for a mouse or trackball. An extended keyboard is necessary for proper control of some DAWs and assuming you’re going to work with MIDI, a MIDI keyboard controller is very desirable too.
Don’t assume your computer should be a laptop. Desktop computers feel rather old-fashioned as I write this in 2024, but while modern laptops are more than powerful enough for studio use there are some practical benefits to having a dedicated studio computer, and desktops are extremely suitable for this purpose. One of the disadvantages of using a laptop is noise. Laptops are inherently less able to stay cool without relying on small, noisy fans. Fan noise is unwelcome in studios.
Which DAW?
While hardware recorders still exist, computers are now overwhelmingly the default choice for recording and audio production. As such, your choice of DAW (Digital Audio Workstation) software should be made with care as you’ll invest many, many hours learning to use this software. While there is no such thing as the wrong choice when it comes to choosing between the principal contenders, this is a decision which will stay with you throughout your involvement in audio production.
Broadly speaking all the major DAWs are suitable for any and all types of music production, but certain DAWs will be preferred in different scenarios and for producing different genres. For example, Ableton Live is extremely popular with producers of entirely electronic music, and Pro Tools is particularly prevalent in professional studios, especially for tracking, but these preferences probably aren’t what should guide your choice as much as your peer group and their choices should. Using the same DAW as other people you know who share your interests can be very beneficial in terms of support and sharing knowledge and sessions.
Audio Interfaces
With a computer, a DAW, and a space in which to work, whether that is a corner of a bedroom or a dedicated room in your house, the next decision which has to be made is choosing an audio interface. If you want to produce music entirely within your DAW and don’t anticipate needing to record any external audio at all then you might not even need an interface. You could probably get by using just the audio I/O of your computer but a dedicated audio interface is still a good idea: Having a dedicated volume control for your monitor speakers and a separate set of outputs for both monitors and your headphones is preferable, and a basic USB audio interface isn’t expensive.
Audio interfaces can cost anywhere from comfortably under $100 to several thousand dollars and while all interfaces do the same job, the quality and facilities vary hugely. In 2024 the choice of data connection between interface and computer is usually between USB3 and Thunderbolt. Thunderbolt is available as standard on current Apple computers but is not standard on PCs. It provides greater bandwidth and speed than USB but USB 3 is fast enough for most tasks and the quality of stability of the device’s software driver also has a significant role to play here. Two things to be aware of here are that Thunderbolt there are many interfaces which use the older Thunderbolt 2 but most current computers have Thunderbolt 3 ports. You can use Thunderbolt 2 interfaces with Thunderbolt 3 computers but the necessary converters are quite expensive. Secondly, many USB interfaces are ‘Class Compliant’. this means that they don’t need you to install a software driver. This is very convenient and means that devices have a good chance of being suppoirted for longer. Better performance is often available using a dedicated driver though. For example RME interfaces have an excellent reputation, largely due to the quality of their drivers. This is an area where research is necessary but my advice is go with the better known companies.
If you already have a clear idea about what kind of work it is you want to do in your studio you’ll be halfway towards choosing an appropriate audio interface because you’ll have a reasonable idea about how many inputs and outputs you’re going to need. If you don’t anticipate needing to record drums or a whole band together then in terms of inputs, you probably don’t need more than two. Most audio interfaces provide facilities for recording using a microphone via an XLR input and the phantom power necessary for using condenser microphones. They will also provide a line input, usually via a quarter inch jack though this might be presented as a ‘Combi’ connector, which is a combined XLR/Jack socket in one. There will also probably be a ‘hi Z’ input which is necessary for recording the output of electric guitars and basses. If you are a DJ you might think you need phono connectors but for anything other than turntables a converter is all you need.
Recording a Band
With only two inputs, it is possible to record all the elements of a typical band recording apart from the drums. Drum kits typically require several microphones. Many people want to record bands performing together all at the same time, and this increases the requirements in terms of equipment considerably. 16 simultaneous inputs is a good number to aim for in the first instance. It’s important to identify how many of these inputs are for microphones as while it’s possible to record keyboards and guitars via line and Hi Z inputs, if you’re trying to record a drum kit at the same time as vocals and acoustic instruments you’re inevitably going to need more than eight simultaneous inputs.
If you are recording acoustic instruments, guitar amplifiers or singers, you’re going to need a microphone. If you’re buying a first microphone, consider a condenser mic. You can get a good quality cardioid pattern condenser for surprisingly little money. You won’t go far wrong with well-known brands and if you’re interested in recording in stereo then looking for a cardioid-only model which has a multi-pattern version also available means that you could buy that multi-pattern version at a later date and try recording stereo using various different techniques using your cardioid mic with your multi-pattern mic. If you’re recording vocals or podcasting then dynamic microphones can be useful. They sound ‘drier’ and as a result can be more suitable in poorly treated or noisy rooms. Be aware that while you need phantom power to use a condenser microphone (most interfaces provide this).
Latency
The other aspect of an audio interface, which needs careful consideration is the number of outputs. For basic productions two outputs, one for a pair of monitor loudspeakers and one for a pair of headphones is sufficient. If you are recording someone other than yourself you’ll probably want a second headphone output and if you are recording a whole band it is usually desirable to give everyone a separate headphone mix via its own output. But things get more complicated still with live tracking of bands because of latency. It is the often unexpected ‘fly in the ointment’ for computer-based studios which initially seem relatively straightforward.
Latency occurs because it takes a certain amount of time for a computer to do the necessary work to calculate the results of all of the mixing and processing which happens in a DAW. During mixing this doesn’t affect the user significantly. There is a very short pause between hitting play and hearing the music, but it makes little practical difference. This is not the case when recording into a DAW. Even the shortest of delays between singing or playing and hearing the result in one’s headphones can be very distracting. A powerful computer can reduce this latency significantly but not completely. If you’ve ever heard about how expensive Pro Tools HDX systems are compared to a copy of Logic Pro, the different ways these two systems handle latency is a lot of the reason this difference exists. Latency can be worked around in various different ways, but it presents a rather intractable technical issue to new users, and new users are by definition the least well equipped to navigate these problems. Some of the more advanced audio interfaces offer DSP mixers to help manage latency while recording, simpler systems provide a mix control which while less sophisticated can also be very successful at avoiding latency problems while recording.
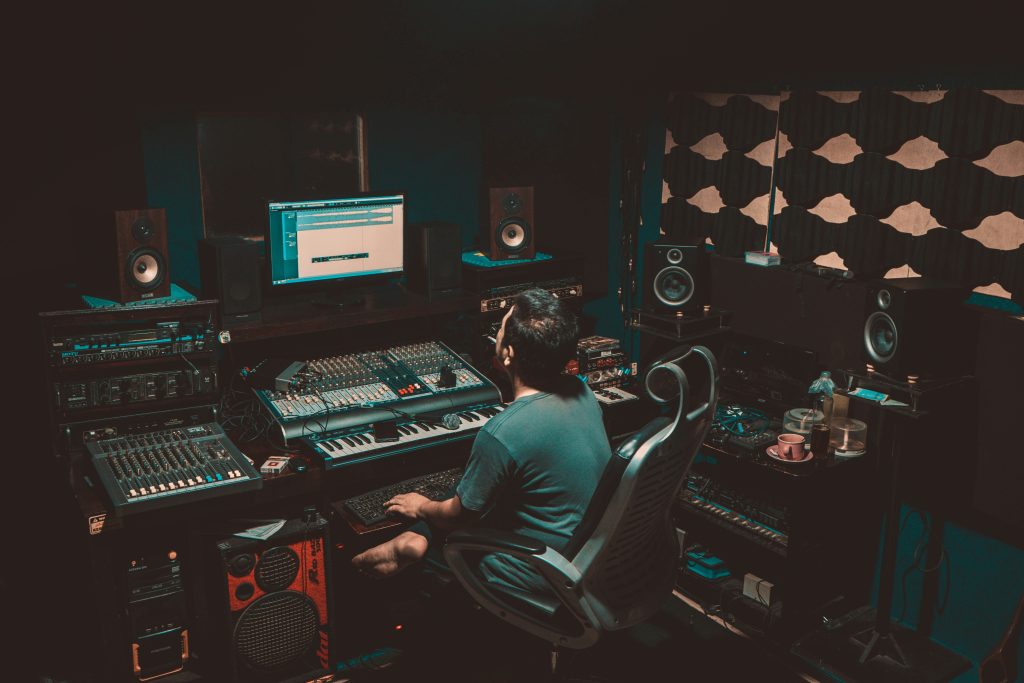
Monitoring
For somebody setting up a studio at home for the first time it’s probably going to be used for stereo work, but if an immersive format like Dolby Atmos or Sony 360 were a consideration, that would have a bearing on the selection of an audio interface as it would need to have sufficient outputs and monitoring facilities for these purposes.
This leads us to the subject of monitoring. You have a DAW and an interface and you will also need a way to hear your work. Headphones are a given. Very few people don’t already own a pair of headphones which are suitable for use in a home studio. For studio use, bluetooth headphones are best avoided. They introduce latency and can also involve data compression which changes the audio quality. With wired headphones the main distinction to be drawn is between closed and open-back headphones. Closed-back headphones leak less sound to the outside world than open back headphones and so are more useful when recording in front of a microphone where open back headphones would produce sound, which can be heard by the microphone. They are also easier to wear for long periods. It is possible to produce and mix entirely on headphones, but most people agree that it is necessary to hear your music on loudspeakers at some point and the choice when it comes to buying a pair of monitor loudspeakers is bewildering.
Here is some general advice on choosing your first pair of monitors.
Unfortunately, there is an inescapable fact about listening to music over loudspeakers – what you hear is always influenced significantly by the room that you are listening in. While the music might sound good in your studio, frequently the music sounds different when it’s played back on a different system in a different room. This is known as poor mix translation and is a really intractable issue with home studios. I’ll cut to the chase here. There’s no magic solution. It’s just a fact of how sound behaves. However there are some things which you can do to help yourself. The behaviour of speakers in rooms is a big subject but when looking at your space and deciding how suitable it is, the size, shape and layout of the room is going to affect the results that you get.
Acoustics
If you’re recording in a room using microphones then the sound of the room will be recorded too. In typical domestic rooms this is usually undesirable. This can be addressed to some extent using acoustic treatment. Treatment is also part of the solution to issues with monitoring over loudspeakers and mix translation so treating your room is always a good idea if you can. However, there is a great deal of confusion around this subject. Firstly, acoustic treatment and soundproofing are different. Soundproofing is what you need if you need to stop sound from escaping your studio and disturbing your neighbours or if you’re working in a noisy environment and need to keep sound out of your studio. The bad news is that this is very hard to do. It requires significant expense and a lot of additional material.
Acoustic treatment is different. Acoustic treatment changes the way the room affects sounds made in it, whether that is performances being recorded or recordings being played back over loudspeakers. Acoustic treatment principally uses sound absorbing materials to soak up sound energy. The thicker the absorber material the lower the frequency it can absorb. Thin lightweight foam products or similar will not be effective at anything other than high frequencies. Many of the acoustic problems encountered in home studios tend to be at bass frequencies and these require the building of large, thick bass traps.
There are products available which some people refer to as ‘room correction’ products. More correctly they are speaker calibration products, and what they do is they measure the output of speakers in the room via a microphone and calculate the difference between that sound and the original sound and correct these differences. This sounds ideal and they can be extremely effective, but only for certain problems. One problem that they cannot solve is dips in low end response caused by ‘room modes’. These modes are caused by standing waves in rooms and cannot be fixed using the solutions. This is not well understood. Bass problems in home studios are difficult to deal with which is why so many people use alternative references like checking mixes on headphones, in the car, and in other rooms.
Choosing the right studio monitors for a home studio
Almost all monitors are active these days. This means that the amplifiers are built in to the speakers, which is both more convenient and also means that the designers can precisely match the amplification with the other components in the speakers resulting in some excellent performance for relatively little cost. For a typical home studio a two-way active monitor with a tweeter and a 6 inch bass/mid driver is an excellent place to start. There are many popular models available and, while the very cheapest might be best avoided, you don’t have to spend a great deal of money before you start getting something that’s extremely usable. Recommended brands would include Genelec, ADAM, Neumann and Dynaudio and at the more affordable end check out IK Multimedia and Kali Audio. Combine this with some acoustic treatment and some speaker calibration software and excellent results can be achieved without spending as much as you might think.
Your monitoring system is the limiting factor on the quality of results you can achieve in your home studio and rather than spending your initial budget on things which might appear to be more fun, my advice would always be to spend any spare money on acoustic treatment. Even if you’re in rented premises there are ways you can treat a room without upsetting your landlord, but rather than sticking carpet and egg boxes on the walls (both terrible ideas) do some research first.
Choosing the right plugins for a home studio
I haven’t said anything at all about which premium bundle of plugins you should buy. My advice for somebody setting up a studio would be to get to know the stock plugins in your DAW really well. Good mixes are about good decisions, not about slightly better plugins. There are some fantastic free plugins available – the quality of which sometimes rivals their paid-for counterparts. The exception to this is buying plugins which enable you to do something which would be unachievable with the tools you already have available to you. A loving re-creation of a vintage compressor is great fun, but you probably already have a compressor. However, if you need to do something which falls outside the capabilities of the plugins you already have, then of course buying a new plugin that fulfils that role is perfectly justified.
Don’t forget stands and cables, and everything else
Something which is very overlooked is the need for suitable stands, cables and even furniture. If you are going to be working for long periods, get a suitable chair. Your monitors need to be at the right height and position to provide the best stereo image. Similarly, mics need good quality stands so they stay where they are put. The need for significant amounts of cabling is vastly reduced compared to how things were in the days of mixers and tape but even these modest amounts of cabling can unexpectedly erode a budget. And lastly, once you have everything in place and you can create to your heart’s content, do you have a way to make backups of all these multitrack sessions you have created? You will need a backup one day, so start backing up now!
If you are thinking about setting up a studio for the first time it can seem that there is a bewildering number of things to consider. There are but don’t be discouraged. It’s both achievable and rewarding. Nobody’s studio is perfect so don’t think that because you have to compromise you’re doing it wrong. And remember, nobody ever finishes their studio. they might think they do but before long they will change it!
Written by Julian Rodgers – Julian Rodgers has been working in professional audio for thirty years in recording studios, live sound and education. He has been a Pro Tools user for over twenty years and as well as being Editor of the Production Expert blog writes for other publications such as Sound On Sound.