Antonio Hanna, music producer and owner of Freefall Studios shares his workflow for remotely recording his clients using the LISTENTO and LISTENTO receiver plugins.
Step 1: Setting up your DAW
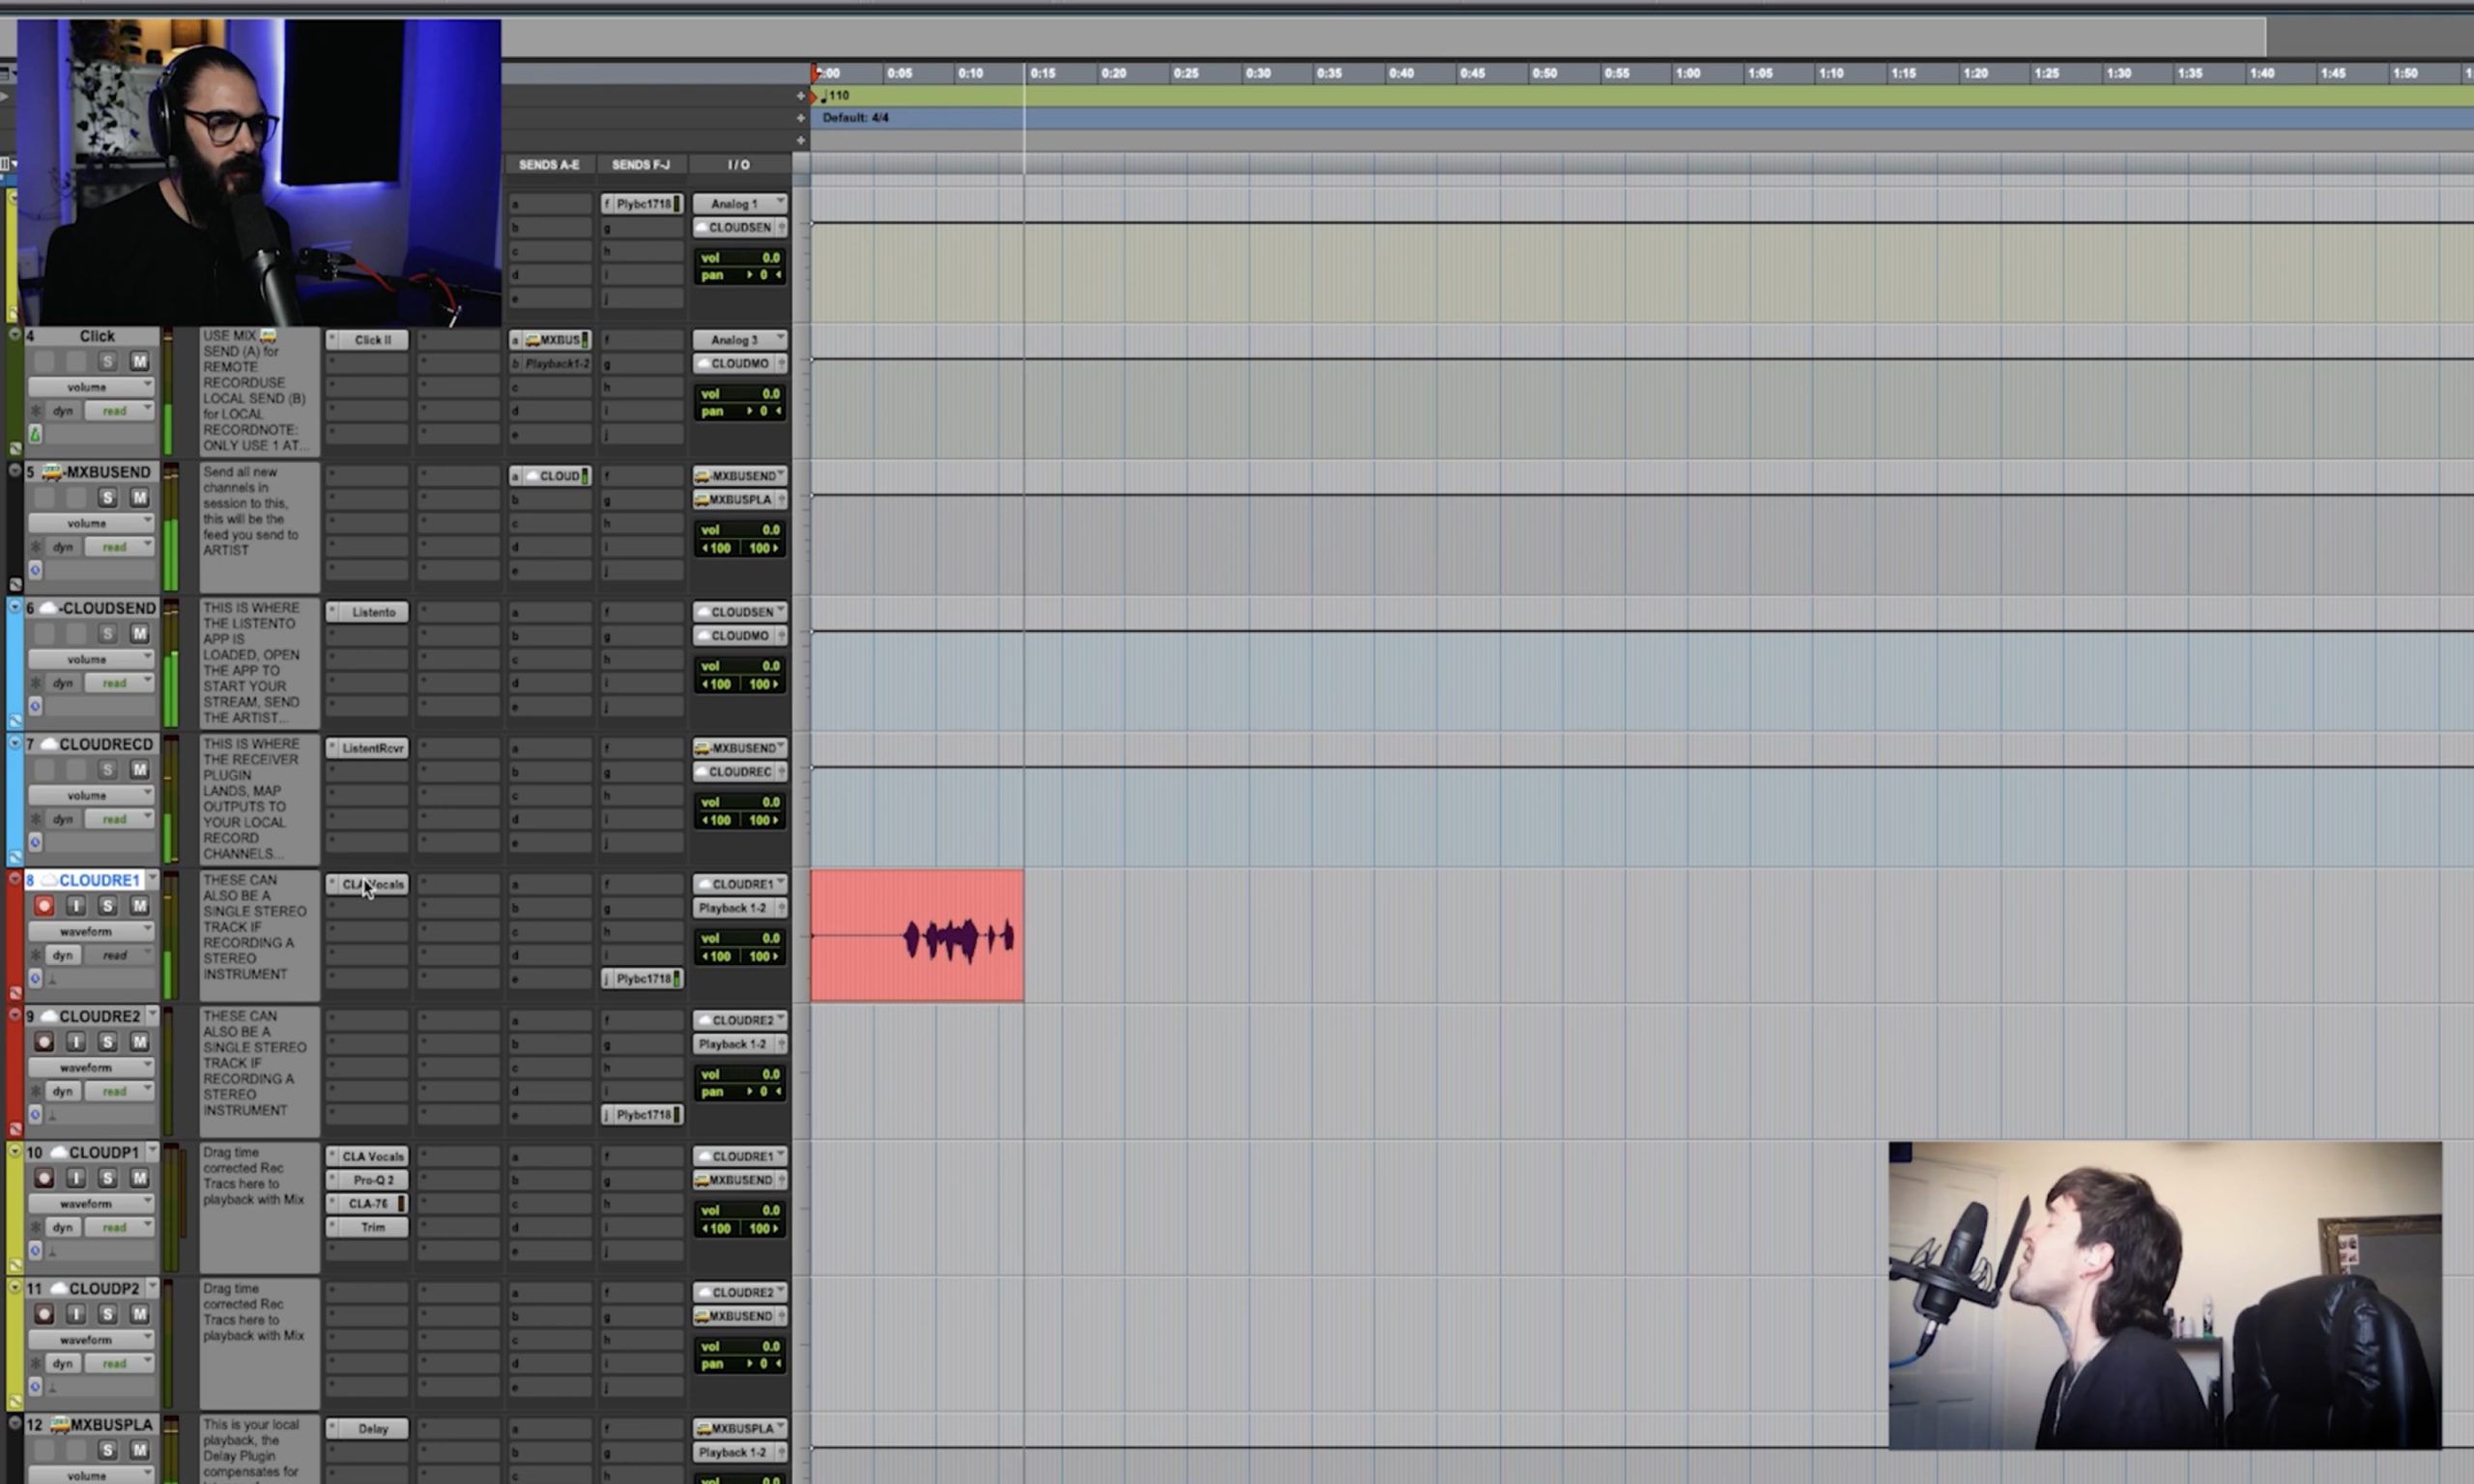
First, we need to ensure the tracks within your DAW are set up correctly. Here is how Antonio lays out his tracks from top to bottom:
– Talkback track: Sent to the artist, so you can communicate with them.
– Click track:
– Mix bus send: This is the track you’ll send all of your audio to for your client to perform along with.
– Cloud send: Add the LISTENTO plugin here.
– Cloud receive: Add the LISTENTO receiver plugin on it. This is where you’ll receive the incoming audio from your client.
– Cloud record 1&2: Your cloud receive track will be routed down to these two tracks to record the incoming audio from the artist.
– Cloud playback 1&2: Once you’ve compensated for the delay (this will be explained shortly) you can use these tracks to play your clients’ audio back to them by routing them to the mix bus send.
– Mix bus play: The final track in the set-up: This is going to be your master outputs 1+2 for you to monitor audio. Add a delay plugin here to make sure your local playback audio and the incoming audio from the artist are coming in at the same time.
You can download Antonio’s free templates for Logic Pro and Pro Tools.
Step 2: Setting your delay
Now that your tracks are set up within your DAW, it’s time to figure out the delay for the delay plugin on your Mix Bus Play track. Here’s how:
– Start a call with your client: This can be through any external software you choose.
– Exchange LISTENTO links and paste them into your LISTENTO receiver plugins and press ‘connect’.
– Ask your client to open their Cloud receive track and open bus 3. Stream the click track to your client and ask them to clap along as they receive it. Record their incoming stream on your Cloud record track.
– In this scenario, bus 3 will be a send back to yourself of your incoming audio to your client. This will allow you to see the delay between when you sent the audio and when you received it back.
– From here, split the recording at the transient of the first click and click on the blank portion. In the top left corner on Pro Tools, the length will appear and this is the number you enter into the delay plugin on your Mix bus play and your nudge value in the top menu.
– Repeat the testing process again. This time once you’ve nudged your clients track back, they should be in time with your grid. Drag this down to your Cloud playback 1&2 and play this back to your client. They should also be able to hear themselves clapping along in time with the click.
Note: The latency may vary during your session. Repeat the above process before any long string of takes or between tracking different instruments.
You will now be able to begin your remote recording session. Watch the full video below for more details or take advantage of Antonio’s free templates for this setup now:
