In recent years, we’ve seen the rise of music producers live streaming on platforms such as Twitch and YouTube. Artists like Kenny Beats, Disclosure, and Ian Kirkpatrick regularly share educational and entertaining live streams that delve into their writing and music production processes.
Live streaming is an incredible way for artists, producers and engineers to create secondary revenue streams, and establish and nurture their online fan bases. It can also provide them with the opportunity to learn new skills, techniques and workflow hacks.
However, setting up your live stream can be a complicated process. Most opt for OBS (Open Broadcaster Software), a free, open-source software for video recording and live streaming.
Thanks to our newly updated OMNIBUS tool, it has never been easier to live stream audio from multiple applications using OBS. Below we break down how you can use OMNIBUS in conjunction with OBS when live-streaming sessions to an audience.
Why use OMNIBUS with OBS?
OMNIBUS is a software solution for seamless audio routing within your Mac. It allows you to route between applications and hardware inputs and outputs, split audio from one source to several destinations for easy A/B, combine audio input devices for DAW outputs and quickly sample audio from various sources.
It offers an intuitive interface and streamlines the audio routing workflow, making it accessible for all users, from beginners and absolute professionals.
OMNIBUS has an easy-to-use routing matrix, allowing you to simply click the connections between devices you want to make. It also allows you to save and recall complex routing setups with ‘snapshots’, which you can label for ease of finding in future and also has precise metering and support for hardware inputs and outputs meaning it can adapt to even the most demanding scenarios.
Let’s see how OMNIBUS makes capturing application audio easy with OBS.
OMNIBUS & OBS in action: How to live stream a music production session
For this example of using OMNIBUS and OBS, we are using the DAW Logic Pro. The same logic will also apply to your DAW of choice.
1. Set your DAW’s playback engine as one of OMNIBUS’ virtual drivers so that your DAW’s output will be travelling through the OMNIBUS application. For this example, we are using OMNIBUS B.
2. Before moving to OBS, you’ll first need to route your DAW’s audio to your designated monitor output so that you can hear your DAW. Simply drag channels 1 and 2 from OMNIBUS B to your chosen monitor output. In this case, a UAD Apollo interface.
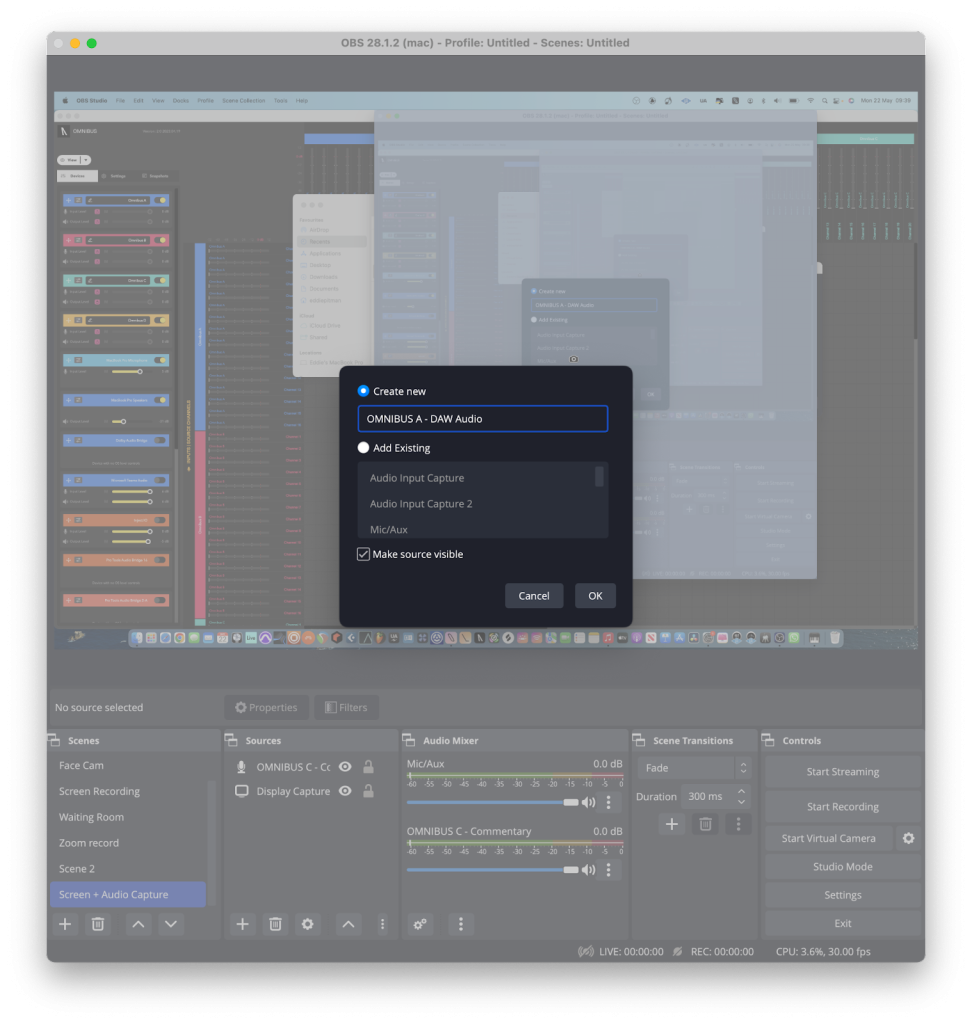
3. In OBS, set up an audio input capture and assign it to one of the OMNIBUS drivers, here we’ve got it set to OMNIBUS A channels 1&2 as we’re only sending our stereo masters output to OBS.
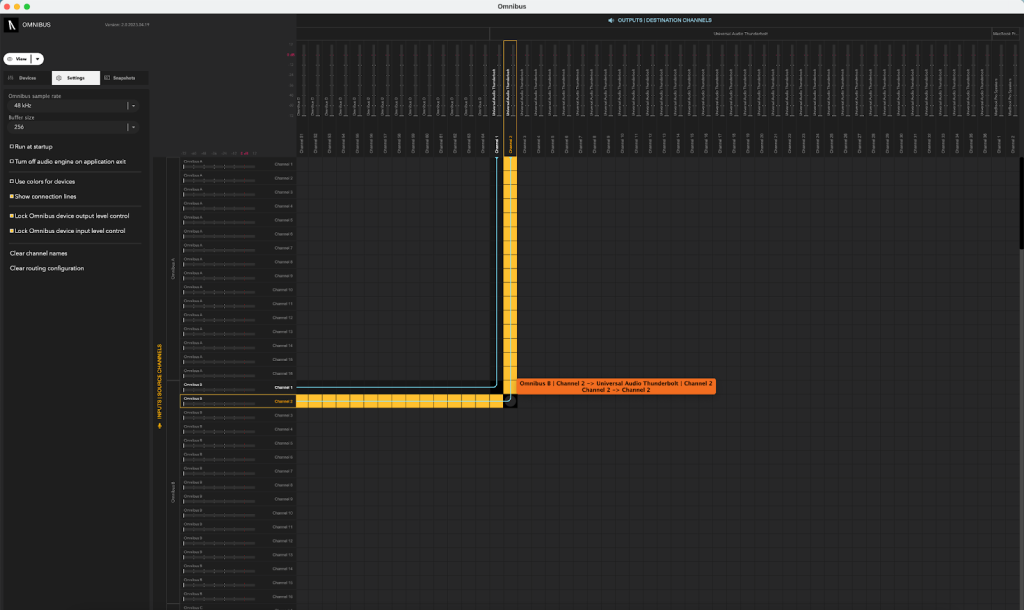
4. Now let’s move to OMNIBUS and get started on our routing configuration. As we have our DAW’s playback set to OMNIBUS B, we’ll simply need to route OMNIBUS B’s channels 1 and 2 to OMNIBUS A’s channels 1 and 2. Once completed your DAW’s audio will be travelling directly into OBS
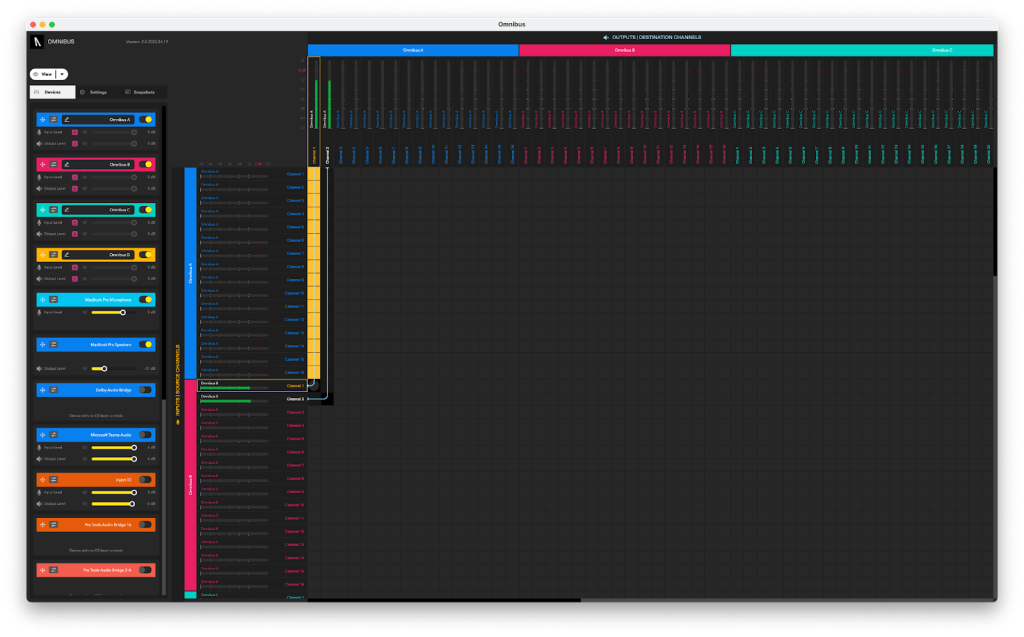
5. Now, let’s set up a microphone to use for our video commentary. As OMNIBUS 2.0 supports hardware inputs, we can utilise any channel from any of our hardware inputs and route them through OMNIBUS to another designated input for OBS. Doing this will allow you to adjust the levels between your microphone and your DAW audio.
If you’re just starting and don’t have a microphone yet you could always use your computer’s built-in microphone.
6. Let’s repeat the same steps as before in OBS and set up an audio capture device but this time, let’s use OMNIBUS C.
If you have a USB audio microphone such as a Snowball mic, you could select this right here. However, for this example I have a microphone plugged into my audio interface that I wish to use as my commentary microphone. All I need to do is route channel 1 from my audio interface into OMNIBUS C channel 1.
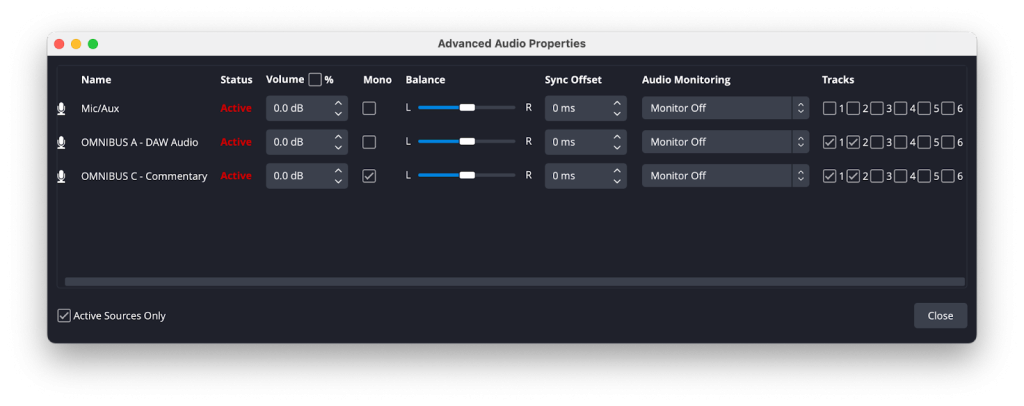
As this is a mono channel, however, you will notice on the input level for our mic in OBS that it is only capturing audio from the left channel. We’ve selected a mono signal and OBS is thinking it’s a stereo input. To amend this, simply navigate to advanced audio properties in your audio capture device for your microphone OBS and navigate to the mic input capture you created and change it from stereo to mono.
7. Now we’ve got our DAW’s audio and mic’s audio we’re now ready to start streaming or screen recording.
Before you start streaming, it’s good practice to test out your stream. Simply start recording and pass some audio from your daw and your microphone. Now play this video back and see whether the audio is being recorded.
Once you’re happy with your setup, you can go back into OMNIBUS and save this routing configuration for later use.
“OMNIBUS makes complex audio routing easy whether you’re an audio professional or enthusiast. Now with OMNIBUS 2.0, there is hardware input support and a new and much-improved user interface for greater flexibility. “
IGOR MAXYMENKO
AUDIOMOVERS COFOUNDER